

Taking a screenshot on your Mac is a simple task, but knowing all the different methods can help you work more efficiently and customize your screenshot process to your needs. Whether you need to capture your entire screen, a specific window, or just a section of your screen, Mac offers several options. This guide will walk you through the different ways to take a screenshot on Mac and provide you with tips to manage and edit your screenshots.
1. Why Take Screenshots on Mac?
Screenshots are an essential tool for various tasks, including capturing important information, troubleshooting issues, or sharing visual content with others. On Mac, screenshots are incredibly versatile and can be saved in different formats, shared instantly, or annotated for clarity. Whether you’re creating tutorials, gathering research, or documenting bugs, knowing how to take a screenshot quickly and efficiently will save you time and enhance your productivity.
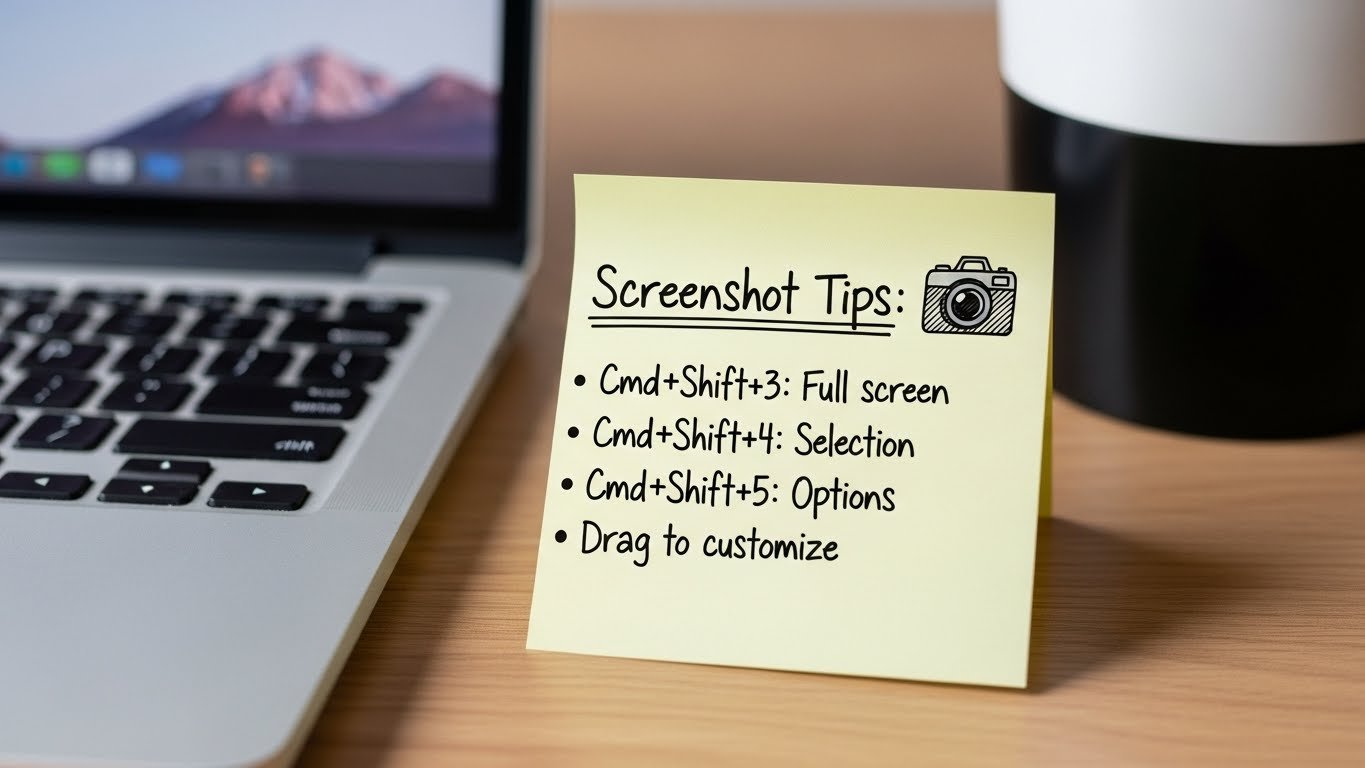
2. Built-in Screenshot Shortcuts
macOS comes with a set of built-in screenshot shortcuts that make it easy to capture your screen in different ways. These shortcuts work without the need for any additional software, making them highly accessible.
Full Screen Screenshot
To capture the entire screen, press the following keyboard shortcut:
Command (⌘) + Shift + 3
This shortcut will take a screenshot of everything visible on your screen, including all open windows, the desktop, and any background elements.
Window Screenshot
If you want to capture a specific window, use the following shortcut:
Command (⌘) + Shift + 4, then press the Spacebar
After pressing these keys, your cursor will change to a camera icon. Hover over the window you want to capture and click to take a screenshot of that window only. This method will automatically exclude the background and focus on the selected window.
Selected Area Screenshot
To capture a specific area of your screen, use the following shortcut:
Command (⌘) + Shift + 4
This shortcut changes your cursor into a crosshair, which you can drag to select the area you want to capture. After selecting the area, the screenshot will be taken automatically. This is particularly useful when you need to capture a portion of your screen for detailed purposes, such as a snippet of a document or a particular section of a webpage.
3. Using the Screenshot Tool in macOS Mojave and Later
Starting with macOS Mojave, Apple introduced a new, built-in Screenshot Tool that gives you even more control over how you take screenshots. This tool can be accessed using a simple keyboard shortcut:
Command (⌘) + Shift + 5
Once activated, a toolbar will appear at the bottom of your screen with several options:
Capture Entire Screen: Captures everything on your screen, just like the traditional full-screen shortcut.
Capture Selected Window: Allows you to capture a specific window by clicking on it.
Capture Selected Portion: Lets you drag to select a portion of the screen for a screenshot.
Record Screen: This option allows you to record a video of your screen, either for the entire screen or a selected portion.
You can also customize where your screenshots are saved by clicking on the “Options” button in the toolbar. This lets you choose between saving to your desktop, documents, clipboard, or any other location.
4. Third-Party Screenshot Apps
While macOS provides built-in screenshot tools, some users prefer additional functionality and customization. Third-party apps offer advanced features like scrolling screenshots, editing tools, and cloud syncing. Here are some popular options:
Snagit: Snagit is a comprehensive screenshot tool that allows you to capture scrolling windows, record videos, and annotate images. It’s ideal for users who need more than the standard screenshot options.
Lightshot: Lightshot is a simple and user-friendly app that lets you capture custom regions of your screen. It also offers easy image editing and sharing options.
Skitch: Skitch is a popular app for annotating and editing screenshots. It’s easy to use and great for adding text, arrows, and shapes to your images.
5. Editing and Annotating Screenshots
Once you’ve taken your screenshot, you might want to edit or annotate it for better clarity. macOS makes it easy to edit screenshots using its built-in Markup tool.
To access Markup:
Open the screenshot from your desktop or the location where it was saved.
Click on the screenshot to open it in Preview.
Click the Markup button (a toolbox icon) in the Preview toolbar.
Markup allows you to add text, shapes, signatures, and even freehand drawings to your screenshot. It’s perfect for highlighting certain areas, adding explanations, or emphasizing important points.
6. Managing Your Screenshots on Mac
By default, screenshots are saved as PNG files to your desktop. Over time, this can clutter your workspace. Here are some tips for managing your screenshots:
Change the Default Save Location: As mentioned earlier, macOS Mojave and later allow you to customize the save location of your screenshots. Use the Screenshot Tool (Command + Shift + 5) to set the destination folder.
Organize Screenshots into Folders: If you take a lot of screenshots, consider creating folders to organize them by project or topic. You can quickly drag and drop files into specific folders for easy access.
Delete Unwanted Screenshots: Screenshots that are no longer needed can be easily deleted. Simply right-click on the image and select Move to Trash or press Command (⌘) + Delete.
Use iCloud for Syncing: To keep your screenshots accessible across all your Apple devices, enable iCloud for your screenshots folder. This way, you can view your screenshots on your iPhone or iPad as well.
7. Call to Action: Share Your Mac Screenshot Tips
Taking screenshots on Mac is a simple yet powerful tool that can make your workflow more efficient and your work more organized. Now that you know the different methods for taking screenshots, try them out and see which one works best for you. Have a favorite screenshot tip that wasn’t mentioned? Or perhaps you have questions about specific screenshot tools on Mac? Share your tips and thoughts in the comments below!
Don’t forget to share this article with your friends or colleagues who may find it helpful, and feel free to subscribe for more Mac tips and tricks!